
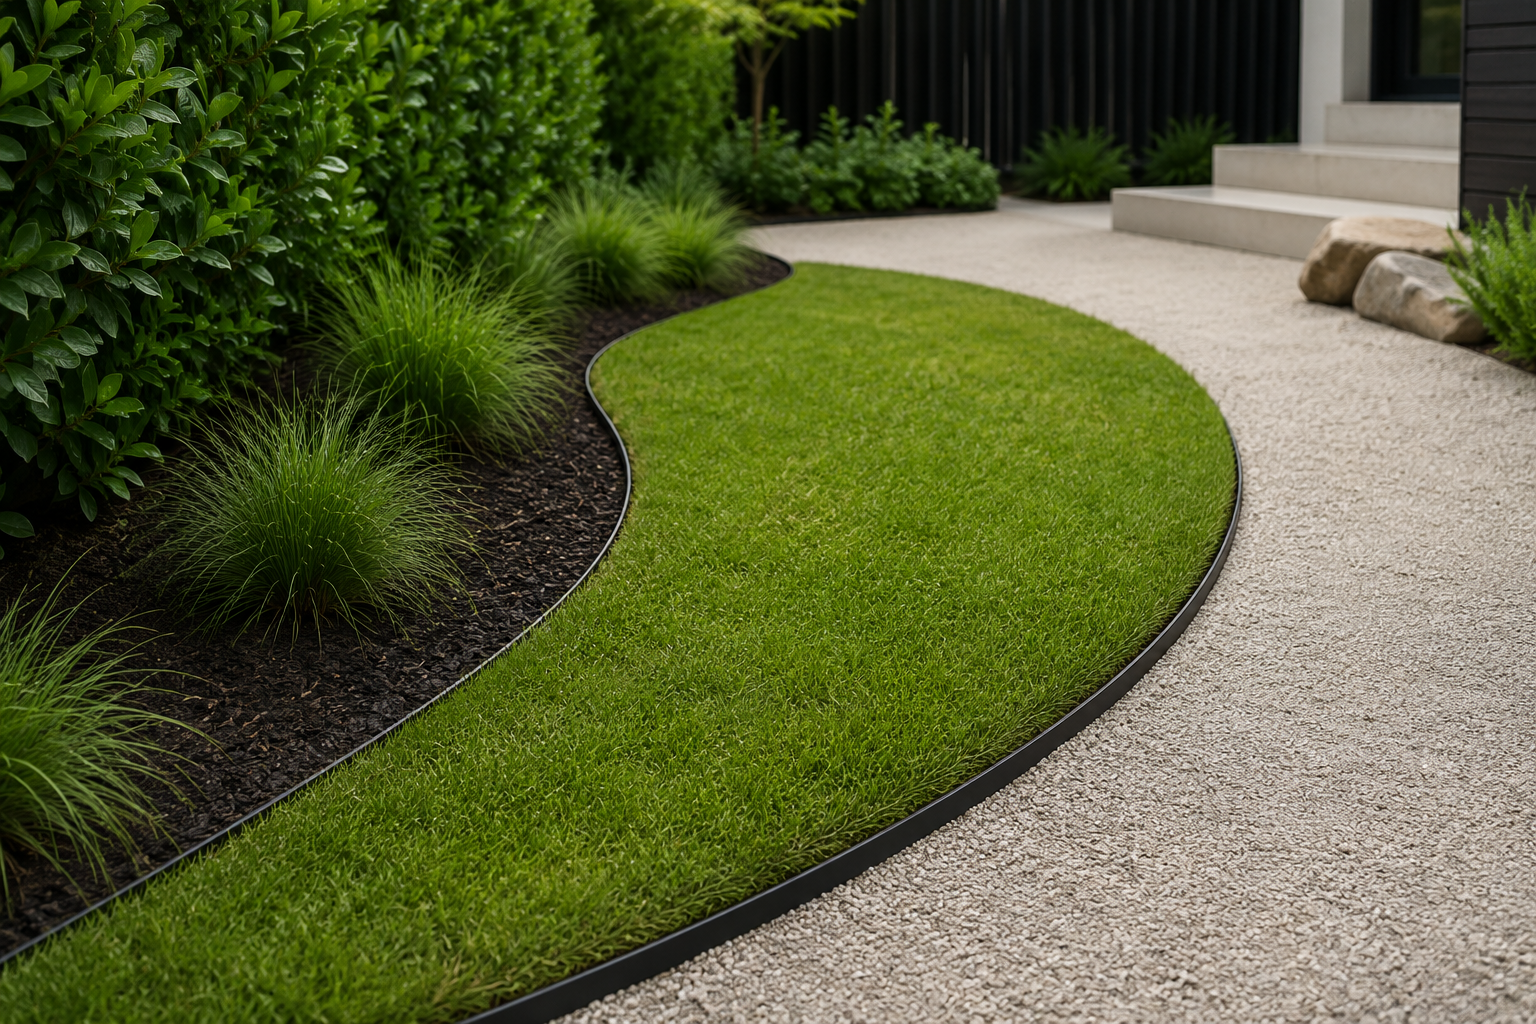
Curved Garden Edging
Create smooth, controlled curves through lawns, garden beds and pathways with a precise architectural edge.
Start with the shape.
A good curve should feel deliberate. It can soften the geometry of a landscape, guide movement through a garden and create a natural transition between lawns, planting, paths and other surfaces.
Begin by considering the complete shape rather than individual bends. Long, controlled curves generally create a calmer landscape and allow the edging to read as one continuous architectural line.
Mark the entire curve on the ground before installing the edging. View it from several positions and adjust the line until each transition flows naturally into the next.
Draw the curve before you build it.
The quality of a curved edge begins with the set-out. Whether the curve follows a consistent radius or a more organic line, establish its shape on the ground before fixing any edging in place.
Look for smooth transitions rather than sudden changes in direction. A well-planned curve should flow naturally from its starting point, through the landscape and into the next straight or curved section.
For a consistent radius, establish a centre point and use a measured line to mark the arc. For free-flowing curves, use a flexible hose or rope to refine the shape before marking the final line.
Let the landscape flow.
Curved edging can create a softer transition between lawn and planting while giving both areas a clearly defined shape. The curve becomes part of the overall garden composition rather than simply separating two surfaces.
Keep the lawn meeting the edging cleanly and use broad, continuous curves wherever possible. This creates a calmer line that is easier to read across the landscape.
Set the edging close to the finished lawn level so the turf meets the metal without a visible gap. On the garden side, mulch or soil can finish slightly below the top of the edge.
Connect curves to the architecture.
Curved garden edging can soften the transition between pathways, paving and surrounding planting. The strongest designs still respond to the geometry of the architecture, even when the landscape itself becomes more fluid.
Allow curves to begin and finish deliberately at paths, steps and paved areas. A smooth transition between these elements makes the landscape feel considered rather than a collection of separate lines.
Avoid letting a curve meet paving at an awkward angle. Refine the final section of the arc so the edging arrives cleanly at the path, paving or architectural element.
Create one continuous line.
Once the curve is set out, form the edging gradually along the established line. The aim is to create a smooth transition through the entire radius rather than forcing the material into isolated bends.
Aluminium is well suited to curved landscape work because it can follow controlled changes in direction while retaining a clean, architectural profile through the finished garden.
Work progressively along the curve and check the line before final fixing. Small adjustments made across a longer section usually create a smoother result than trying to correct one sharp point.
Smooth beats complicated.
Tight bends can interrupt the flow of a landscape and make an edge feel forced. Broader curves usually create a cleaner visual line and allow the garden to move more naturally around lawns, planting and paths.
If a change in direction feels too abrupt, increase the radius or extend the transition over a longer distance. The goal is a curve that feels intentional from beginning to end.
Step back from the edge regularly while setting it out. Curves that look acceptable at close range can appear uneven when viewed across the wider garden.
Keep the edge visually quiet.
The finished height of curved edging is just as important as the shape of the curve. When edging sits too high, it can become the dominant line instead of quietly defining the landscape.
Where edging meets lawn, keep the top close to the finished turf level so the grass meets the metal cleanly. Garden soil, mulch or gravel can finish slightly below the top where containment is needed.
Check the height continuously around the curve rather than only at the beginning and end. Smooth curves look best when both the horizontal line and the finished level remain consistent.
Match the edge to the landscape.
The right system depends on both the shape of the curve and the landscape condition around it. Heavy Duty is suited to defined boundaries between lawns, garden beds and other adjoining surfaces.
Where the curve also needs to accommodate a greater change in level, Terrace or HiRise can create a deeper architectural edge while maintaining the same controlled landscape line.
Start with the required finished height, adjoining surfaces and the radius of the curve. The best system is the one that suits the whole landscape condition rather than the curve alone.
The curve should feel inevitable.
The best curves feel as though they belong naturally in the landscape. Smooth radii, consistent levels and clean transitions allow the edge to guide the eye without becoming the feature itself.
Once the surrounding lawn, planting, mulch or paving is complete, the metal should become a quiet line that holds the original shape of the design together.
Walk around the finished landscape and view the curve from several directions. Look for flat spots, sudden changes in radius or uneven levels and refine them before completing the surrounding surfaces.
Design the curve. Then price it.
Choose the Hedge system, height and finish for your landscape, then build an estimated project price.